Are you exhausted after a long day and don’t have the energy to clean your bathroom? Or do you just simply want a sparkling bathroom as soon as possible? Look no further! Cleaning your bathroom doesn’t have to be a daunting and time consuming task. With our easy cleaning tips, you’ll have your bathroom shining within no time. From using microfiber cloths and toilet brushes to white vinegar and shower curtains, we have the perfect tricks to help you get done with your deep cleaning in no time! So, if you’re ready go get your bathroom sparkling quick, let’s get started!
What You’ll Need
To clean your bathroom quickly and effectively, you’ll need a few essential items. These accessories and cleaning supplies will help you tackle various surfaces and eliminate dirt, grime, and water stains. Here’s a list of items that you should have on hand:
1. Microfiber cloth: This cloth is highly absorbent and excellent for cleaning and wiping down surfaces without leaving streaks or lint behind.
2. Toilet brush: An essential tool for cleaning the toilet bowl and removing any stubborn stains and buildup.
3. Warm water: Using warm water can help soften and loosen dirt and grime, making it easier to clean.
4. Glass cleaner: Ideal for cleaning mirrors, glass shower doors, and other glass surfaces to leave them sparkling and streak-free.
5. All-purpose cleaner: A versatile cleaning solution that can be used on various surfaces like countertops, sinks, and shower walls.
6. White vinegar: A natural cleaning agent that can dissolve stains, remove bacteria, and eliminate water spots on faucets and other fixtures.
7. Spray bottle: Fill it with a mixture of water and a preferred cleaner to easily spray and clean surfaces.
8. Baking soda: A gentle abrasive that can help remove soap scum, grime, and stains from sinks, tubs, and showers.
9. Rubber band: Use it to secure a damp cloth around the shower head or faucet to remove mineral deposits and buildup.
Having these essential items on hand will ensure that you have everything you need to efficiently clean your bathroom and achieve a fresh and hygienic space in no time.
Preparing the Bathroom
Preparing the Bathroom for Quick and Efficient Cleaning
Before diving into cleaning your bathroom, it’s important to take a few necessary steps to ensure a smooth and efficient process. By properly preparing your bathroom, you can save time and effort while achieving a sparkling clean result. Here are some essential steps to get started:
1. Clear the Space: Begin by removing any towels, bath mats, and other items from the bathroom surfaces. This will make it easier to access all areas and prevent any accidental damage or staining.
2. Gather Cleaning Supplies: Arrange all the necessary cleaning supplies in a caddy or bucket, including microfiber cloths, toilet brush, glass cleaner, and all-purpose cleaner. Having everything you need in one place will save time and minimize distractions.
3. Vacuum the Bathroom: Before starting the cleaning process, give the bathroom a quick vacuum. This will help remove any loose dirt, hair, or debris from the floors and corners, ensuring a more thorough cleaning.
By following these preparatory steps, you can create a clean and organized environment that sets you up for an efficient cleaning process. Remember to have all your cleaning supplies readily available, remove towels and mats, and vacuum the area to achieve a shining bathroom in no time.
Cleaning the Toilet
Cleaning the toilet is an essential part of keeping your bathroom clean and hygienic. Regular toilet cleaning not only helps eliminate germs and bacteria but also keeps unpleasant odors at bay. By following a few simple steps and using the right cleaning products and tools, you can ensure that your toilet is sparkling clean in no time. Here’s a step-by-step guide to cleaning the toilet quickly and effectively:
1. Gather your supplies: Before you begin, gather all the necessary supplies, including toilet bowl cleaner, a toilet brush, rubber gloves, and a microfiber cloth. Having everything at hand will save you time and effort.
2. Apply the toilet cleaner: Start by applying the toilet cleaner to the inside of the bowl, making sure to coat the entire surface, including under the rim. Allow the cleaner to sit for a few minutes to break down any stains or grime.
3. Scrub the toilet bowl: Grab the toilet brush and scrub the inside of the bowl from top to bottom, paying extra attention to any stubborn stains or mineral deposits. Make sure to reach all the corners and areas where dirt may accumulate.
4. Clean the exterior: Once the inside of the toilet bowl is clean, turn your attention to the exterior. Wipe down the seat, lid, and base of the toilet with a disinfecting wipe or a damp microfiber cloth. Don’t forget to clean the area around the toilet, including the floor and walls, if necessary.
5. Finish with a thorough rinse: Finally, flush the toilet to rinse away any remaining cleaner and debris. Use a clean cloth or paper towel to wipe down the handle, lever, and any other surfaces that may have come into contact with cleaning products.
By following these steps, you can efficiently clean your toilet, ensuring a fresh and hygienic bathroom environment for you and your family.
Clearing Water Stains in the Toilet Bowl
Water stains in the toilet bowl can be unsightly and difficult to remove. However, with a few simple steps, you can effectively clear these stubborn stains.
To start, pour a cup of baking soda into the toilet bowl. Allow the baking soda to sit for a few minutes, giving it time to break down the water stains.
Next, take a toilet brush and vigorously scrub the bowl, focusing on the areas with water stains. The abrasive texture of the baking soda will help to lift and remove the stains.
For particularly stubborn stains, you can use a damp pumice stone. Gently scrub the stains with the pumice stone, being careful not to press too hard and risk scratching the porcelain.
After scrubbing, flush the toilet to rinse away the baking soda and any loosened stains. Remember to close the toilet lid before flushing to prevent bacteria from spreading.
By following these simple steps and using baking soda and a pumice stone, you can effectively clear water stains in the toilet bowl, leaving it clean and fresh.
Scrubbing and Cleaning Around the Toilet Rim
Cleaning and scrubbing around the toilet rim is an important part of keeping your bathroom clean and sanitary. Follow these steps to effectively remove dirt, grime, and stains:
1. Start by squirting a generous amount of toilet bowl cleaner inside the toilet bowl. Allow it to sit for a few minutes to break down any buildup.
2. While the cleaner is working its magic, take a damp microfiber cloth and dip it into a mixture of hot water and bleach. Make sure the cloth is damp but not soaking wet.
3. Begin wiping down the exterior of the toilet, starting from the top and working your way down. Pay attention to areas prone to dirt and grime, such as the bottom of the toilet seat, the sides, and the base.
4. If you notice any stubborn buildup areas, spray Clorox Bathroom Cleaner directly on the surface and let it sit for a few minutes. This will help to loosen tough stains and make them easier to remove.
5. Using the same damp microfiber cloth, wipe or scrub the buildup areas as needed. Be sure to rinse the cloth regularly to prevent spreading the dirt.
6. After thoroughly cleaning the exterior, return to the interior of the toilet bowl. Use a toilet brush to scrub away any remaining stains or residue.
7. Finally, flush the toilet to rinse away the cleaner and any loosened dirt. Don’t forget to close the toilet lid before flushing to prevent the spread of bacteria.
By following these steps and using the right tools such as a microfiber cloth, hot water, and bleach, you can effectively scrub and clean around the toilet rim, leaving your bathroom fresh and sanitized.
Washing Down the Toilet Seat and Lid
When it comes to cleaning the bathroom quickly, it’s important not to neglect the toilet seat and lid. Here’s a step-by-step guide on how to wash them down effectively:
1. Begin by taking a damp microfiber cloth and soaking it in a mixture of hot water and bleach. Make sure the cloth is damp but not dripping wet.
2. Wipe down the exterior of the toilet, paying special attention to the toilet seat and lid. Use the damp cloth to remove any dirt or grime that may have accumulated.
3. For extra stubborn buildup, spray some Clorox Bathroom Cleaner directly onto the surface. Allow it to sit for a few minutes to loosen the dirt and stains.
4. Use the same damp cloth to wipe away the cleaner and any remaining buildup. Rinse the cloth regularly to prevent spreading the dirt.
5. Now, shift your focus to the interior of the toilet bowl. Grab a toilet brush and give it a thorough scrubbing to remove any remaining stains or residue.
6. Finally, flush the toilet to rinse away the cleaner and any loosened dirt. Remember to close the toilet lid before flushing to prevent the spread of bacteria.
By following these steps and using the right cleaning products, you can ensure that your toilet seat and lid are thoroughly washed down and free from any dirt or grime.
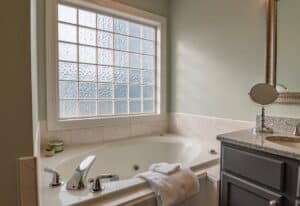
Cleaning the Shower/Bathtub
Keeping your shower and bathtub clean is essential for maintaining a hygienic and visually appealing bathroom. With the right tools and cleaning products, you can easily tackle this task and have a sparkling shower in no time. Start by gathering your supplies, which may include a microfiber cloth, all-purpose cleaner, glass cleaner, white vinegar, baking soda, and a spray bottle. Begin by removing any bath mats or other items from the shower or bathtub area, and give them a good shake outside to remove any loose dirt or debris. Next, spray the walls, floor, and any glass shower doors with an all-purpose cleaner. Allow it to sit for a few minutes to loosen any soap scum or grime. Use a damp microfiber cloth or sponge to wipe down the surfaces, paying special attention to corners and edges. For stubborn stains or water spots, you can make a paste of baking soda and water and scrub the affected areas. Rinse everything thoroughly with clean water, using a detachable shower head or a cup to ensure all cleaning residues are removed. Finally, wipe down any glass surfaces with a glass cleaner to remove any streaks or water marks. With these simple steps, you can enjoy a clean and refreshing shower or bath experience.
Removing Soap Scum from Walls and Doors
Soap scum is a common issue in bathrooms, appearing as a white or gray film on walls and doors. This buildup occurs due to the combination of minerals in hard water and soap residue. Thankfully, there are effective methods available to remove soap scum and restore the cleanliness of your bathroom surfaces.
One option is to use a commercial product like Rejuvenate Soap Scum Remover. Follow the instructions on the packaging, and spray the product onto the affected areas. Allow it to sit for a few minutes before scrubbing gently with a sponge or brush. Rinse thoroughly with water after cleaning.
Alternatively, you can create a DIY solution using vinegar, water, and dish detergent. In a spray bottle, mix equal parts white vinegar and water, then add a small amount of dish detergent. Shake well to combine the ingredients. Spray the mixture onto the soap scum and let it sit for approximately 15 minutes. Use a sponge or brush to scrub the area, then rinse with water.
Remember to use appropriate safety precautions when working with cleaning products, and always test a small inconspicuous area before applying them to larger surfaces.
By using either a commercial product like Rejuvenate Soap Scum Remover or a DIY vinegar and dish detergent solution, you can effectively remove soap scum from walls and doors in your bathroom. Regular cleaning and maintenance will help prevent soap scum buildup in the future, keeping your bathroom looking clean and fresh.
Spraying Down Shower Head with Vinegar Solution
Regular cleaning of your shower head is essential to maintain proper water flow and prevent mineral buildup. One effective and natural cleaning solution is to spray down the shower head with a vinegar solution.
To get started, you’ll need a mixture of equal parts white vinegar and water. Pour the solution into a spray bottle and ensure that the shower head is completely submerged. If necessary, remove the shower head and soak it in a bowl of vinegar solution for about 15-20 minutes.
The vinegar solution works to break down and dissolve mineral buildup, which can clog the nozzles and decrease water pressure. Once the shower head has soaked, use a soft brush or toothbrush to gently scrub away any remaining buildup.
After scrubbing, rinse the shower head thoroughly with water to remove any traces of vinegar. Once the vinegar smell dissipates, your shower head will be clean and unclogged, providing a satisfying shower experience.
While vinegar is a safe and effective cleaning agent for most shower heads, it is important to note that it should not be used on granite or marble surfaces, as it can cause damage. Always check the manufacturer’s recommendations and use alternative cleaning methods if necessary.
By incorporating regular cleaning and using a vinegar solution, you’ll keep your shower head in excellent condition, ensuring optimal water flow, and a refreshing shower every time.
Wiping Down Tiles and Fixtures with Warm Water & Microfiber Cloth
When it comes to cleaning your bathroom quickly and efficiently, wiping down tiles and fixtures with warm water and a microfiber cloth can be a game-changer.
Microfiber cloths are a must-have tool for any cleaning task, as they are incredibly absorbent and effective at trapping and removing dirt and grime. Compared to traditional cotton cloths, microfiber cloths have finer fibers that can reach deep into the pores of your bathroom tiles and fixtures, ensuring a thorough and streak-free clean.
To get started, dampen your microfiber cloth with warm water. The warm temperature helps to loosen and dissolve any stubborn residue on your tiles and fixtures. Begin by wiping down the tiles, paying attention to any areas with visible dirt or stains. Move on to the fixtures, such as the faucets, showerhead, and towel rack. Be sure to give them a thorough wipe to remove any water spots or fingerprints.
The beauty of using warm water and a microfiber cloth is that you don’t need any additional cleaning products, making it a cost-effective and eco-friendly cleaning method. Plus, you won’t have to worry about harmful chemicals or strong odors in your bathroom.
In just a few minutes, your bathroom tiles and fixtures will be left sparkling clean and free from dirt and grime. So grab your microfiber cloth, dampen it with warm water, and start wiping down your bathroom for a quick and efficient clean.
Cleaning Other Areas of the Bathroom
In addition to the tiles and fixtures, there are several other areas in your bathroom that require regular cleaning to keep your space looking fresh and hygienic. Let’s take a look at some effective methods for tackling these areas quickly and efficiently.
1. Shower Doors and Curtains: Glass shower doors and plastic shower curtains can easily accumulate soap scum and water stains. To remove these, mix equal parts of white vinegar and water in a spray bottle. Spray the solution onto the doors or curtains and let it sit for a few minutes. Then, scrub the surface with a damp microfiber cloth or a sponge. Rinse thoroughly with warm water and dry with a clean cloth.
2. Bathroom Mirrors: To clean your bathroom mirrors and remove any streaks or smudges, mix a small amount of dish soap with warm water in a spray bottle. Spray the solution onto the mirror and wipe it clean with a microfiber cloth or a lint-free cloth. For a streak-free finish, use a circular motion while wiping.
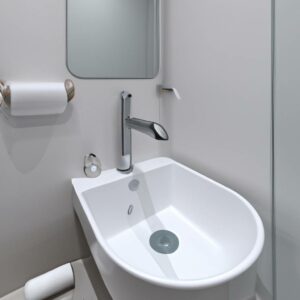
3. Bathroom Sinks: Start by removing any debris from the sink using a paper towel or a damp cloth. Then, apply a small amount of your preferred bathroom cleaner or an all-purpose cleaner onto a damp cloth and wipe down the entire surface of the sink, including the faucets and handles. Rinse with warm water and dry with a clean cloth.
4. Toilet Bowl: To effectively clean the toilet bowl, start by pouring a cup of bleach or a toilet bowl cleaner into the bowl and let it sit for a few minutes. Use a toilet brush to scrub the bowl thoroughly, paying attention to the rim and under the rim. Flush the toilet to rinse away the cleaner and use a clean cloth to wipe down the exterior surface of the toilet.
5. Bath Mats: Bath mats can easily accumulate dirt and moisture, making them prone to mildew and odor. To clean them, shake off any loose dirt and debris and then wash them in the washing machine according to the instructions on the care label. Hang them to air dry or tumble dry on low heat.
By following these simple steps, you can efficiently clean other areas of your bathroom, ensuring a sparkling and fresh environment. Remember, regular cleaning and maintenance is key to keeping your bathroom looking its best.
Spot-Cleaning Mirrors & Glass Surfaces with Glass Cleaner & Microfiber Cloth
When it comes to spot-cleaning mirrors and glass surfaces in your bathroom, a glass cleaner and a microfiber cloth are your go-to tools. Follow these simple steps to effectively clean and achieve a streak-free finish.
First, spray the glass cleaner onto the mirror or glass surface. Be sure to cover the entire area evenly. Next, take your microfiber cloth and start wiping the cleaner in circular motions. This helps to remove any dirt, smudges, or fingerprints.
Make sure to pay attention to all areas of the mirror or glass surface, ensuring that every spot is thoroughly cleaned. The microfiber cloth is key here as it helps to avoid lint or scratches on the glass.
Continue wiping until all streaks and smudges are removed. If needed, you can spray more glass cleaner onto the cloth and repeat the process.
By using a trusted glass cleaner and a microfiber cloth, you can easily achieve a spotless and sparkling mirror or glass surface in your bathroom. Remember to regularly spot-clean to maintain a clear reflection and enhance the overall aesthetics of your space.
For optimal results, use a lint-free and non-abrasive microfiber cloth. This will ensure a streak-free finish and prevent any damage to the glass.
Take a moment to step back and admire your spotless bathroom mirror or glass surface, knowing that it only took a few minutes of your time using these simple tools and techniques.
Removing Hair & Debris from Bath Mats With Vacuum or Broom
To keep your bathroom clean and hygienic, it’s important to regularly remove hair and debris from your bath mats. Here’s how you can efficiently do it using either a vacuum or a broom.
First, clear the bathroom floor of any items or obstacles that might hinder your cleaning process. This will ensure that you have a clear path to work with.
Next, if weather permits, take the bath mats outside to shake off any loose hair and debris. This initial step will help minimize the amount of dirt that may be stuck on the mats.
If you’re using a vacuum, attach a brush attachment to it. Starting from one corner, slowly run the vacuum over the surface of the bath mat, making sure to cover all areas. The brush attachment will help to dislodge any trapped hair and debris from the mat’s fibers.
Alternatively, if you prefer using a broom, gently sweep the surface of the bath mat, moving in one direction. Make sure to go over the mat a few times to ensure thorough removal of hair and debris.
Once you have finished vacuuming or sweeping, carefully inspect the bath mats to ensure that all hair and debris have been removed. If you notice any stubborn particles, you can use a handheld vacuum or a damp cloth to spot clean the affected areas.
By regularly removing hair and debris from your bath mats using a vacuum or broom, you can maintain a clean and pleasant bathroom environment.
Washing Towels, Rugs, & Curtains as Necessary
When it comes to maintaining a clean bathroom, it’s important to not overlook items such as towels, rugs, and curtains. These items can harbor dirt, dust, and bacteria, so it’s essential to wash them regularly. Here are the steps to wash towels, rugs, and curtains as necessary:
1. Check the care labels: Before washing any of these items, check the care labels for specific washing instructions. This will help ensure that you don’t accidentally damage them or cause them to shrink.
2. Washing towels: For towels, it’s best to use hot water and a heavy-duty detergent. This will effectively remove any dirt, body oils, or other buildup. To freshen them up and restore softness, add a cup of white vinegar to the rinse cycle.
3. Washing rugs: Start by shaking off any loose debris from the rug. Then, it can be safely washed in a washing machine. Use a gentle cycle and mild detergent to prevent any damage. Once washed, allow the rug to air dry completely before placing it back in the bathroom.
4. Washing curtains: Like rugs, curtains can also be machine washed. Use a delicate setting and a mild detergent. However, be sure to check if the curtains need to be air-dried or if they can be placed in a dryer. Follow the instructions on the care label to avoid any shrinkage or damage.
By regularly washing towels, rugs, and curtains, you can keep your bathroom clean and hygienic. This simple task will help remove dirt, dust, and odor, ensuring a fresh and inviting space for you and your family. Remember to follow the care instructions for each item to ensure their longevity and performance.
Finishing Up
After completing the main tasks of cleaning the bathroom, there are a few final steps to take to ensure a thorough and efficient clean.
First, rinse out the microfiber cloth that was used for wiping down surfaces. Microfiber cloths are a great choice for cleaning as they grab and hold onto dirt and grime effectively. Rinse the cloth under warm water until it runs clear, then wring out any excess water. Hang the cloth to air dry or place it in a designated spot to be laundered later.
Next, spot-clean the floor if there are any visible stains or spills. Use a mop or a damp microfiber cloth with a small amount of all-purpose cleaner to target the problem areas. Make sure to dry the affected spots with a clean cloth or towel to prevent slips and falls.
Dispose of any dirty rags or cleaning cloths in a designated bag or bin. It’s important to properly dispose of these items to prevent the spread of bacteria or germs.
To quickly dry the shower walls, use a dry microfiber cloth or towel to wipe away any excess water droplets. This will help prevent water stains and keep the surfaces looking clean.
Lastly, for a quick and easy way to keep your shower fresh between deep cleanings, try making a homemade daily shower cleaner. Mix equal parts water and white vinegar in a spray bottle and add a few drops of dish soap. Shake the bottle to mix the ingredients and lightly spray the shower walls. This mixture will help prevent soap scum and water spots, making your next cleaning session even easier.
Conclusions
In conclusion, cleaning your bathroom quickly and efficiently can be achieved by following a few simple steps.
Using a microfiber cloth is essential for its effective dirt and grime removal. Rinse the cloth thoroughly under warm water and hang it to air dry or put it in a designated spot for laundering later.
Spot-clean any stains or spills on the bathroom floor using a mop or damp microfiber cloth with a small amount of all-purpose cleaner. Ensure that the cleaned areas are dried properly with a clean cloth or towel to avoid any accidents.
Dispose of dirty rags and cleaning cloths in a designated bag or bin to prevent the spread of bacteria and germs.
To prevent water stains, use a dry microfiber cloth or towel to quickly wipe away any excess water from shower walls.
In summary, cleaning your bathroom quickly involves using the right tools and products, such as microfiber cloths and all-purpose cleaners, as well as properly disposing of dirty cleaning materials. Remember to spot-clean spills, dry the surfaces, and prevent water stains. With these tips and tricks, you can maintain a clean and tidy bathroom in no time.