Are you tired of the never-ending battle against dirt and grime in your bathroom? Does it seem like no matter how often you clean there’s always something else that needs to be done? Well, fear not! Our 10-step guide is here to help you make quick work of cleaning your bathroom. We’ll show you the easiest way to clean and maintain a sparkling bathroom so you can spend less time scrubbing and more time enjoying your clean and inviting space. From removing water stains from your toilet bowls to cleaning your shower curtain, we’ll walk you through the process step-by-step.
We’ll show you how to use a toilet brush, warm and hot water, and an all-purpose cleaner to remove soap scum, dirt, and grime from your bathroom surfaces. So, get ready to put on your cleaning gloves and get to work! Let’s get started and make your bathroom shine!
Overview of the Process
Cleaning a bathroom may seem like a daunting task, but with a step-by-step plan, it can be easily tackled. By following these simple instructions, you can achieve a sparkling clean bathroom in no time. From the toilet bowl to the shower walls, we’ll guide you through the process, providing tips and recommendations along the way. So put on your gloves and let’s get started!
Materials Needed
To effectively clean your bathroom, you will need a few essential materials. Having the right tools on hand will make the cleaning process much easier and more efficient. Here are the materials you’ll need:
1. Toilet brush: A good-quality toilet brush is essential for scrubbing away dirt and grime from the toilet bowl.
2. Bowl cleaner: Choose a reliable toilet bowl cleaner to help remove stains and disinfect the toilet.
3. All-purpose cleaner with bleach: An all-purpose cleaner that contains bleach will help tackle tough stains and kill bacteria on various surfaces in your bathroom.
4. Bucket: Use a bucket to mix cleaning solutions and carry around other cleaning materials.
5. Disinfectant wipes: These convenient wipes are great for quickly wiping down surfaces and killing germs.
6. Reusable rag or sponge: A soft cloth or sponge is useful for wiping down countertops, sinks, and other surfaces.
7. Paper towels: Keep paper towels handy for drying surfaces and quickly wiping up spills.
Remember, when working with cleaning products that contain bleach, it is advisable to use rubber gloves to protect your hands.
By having these materials readily available, you’ll be well-equipped to clean your bathroom effectively and efficiently.
Cleaning the Toilet Bowls and Seats
Cleaning the Toilet Bowls and Seats:
Toilet bowls and seats are notorious for harboring germs and bacteria, making them essential areas to clean in your bathroom. Follow these simple steps to ensure that your toilet bowls and seats are sparkling clean and germ-free. First, put on a pair of rubber gloves to protect your hands from harsh cleaning chemicals. Next, use a toilet brush and an effective bowl cleaner to scrub away dirt, grime, and stains from the inside of the toilet bowl. Make sure to brush under and around the rim to remove any stubborn buildup. Once the bowl is clean, move on to the toilet seat. Wipe the seat with a damp cloth or disinfectant wipe to remove any surface dirt or bacteria. For a deeper clean, use a mixture of warm water and an all-purpose cleaner with bleach. Scrub the seat with a soft sponge or cloth, paying attention to any crevices or hinges. Finally, rinse the toilet seat with clean water and dry it thoroughly with a clean cloth or paper towel. By following these steps, you can preserve the cleanliness and hygiene of your toilet bowls and seats.
Preparing the Toilet Bowls for Cleaning
Before diving into the task of cleaning your bathroom, it’s crucial to properly prepare your toilet bowls. This initial step will ensure effective cleaning and a fresh, sanitized bathroom. Here’s a simple guide on how to prepare your toilet bowls for cleaning:
1. Gather the necessary materials: Before you begin, make sure you have rubber gloves and a toilet brush. These tools are essential for a thorough cleaning.
2. Remove excess water: To make cleaning easier, start by removing any excess water from the toilet bowls. You can do this by turning off the water supply to the toilet and flushing it a few times until most of the water is drained. Alternatively, you can use a plunger to push the water down the drain.
3. Put on rubber gloves: Protect your hands from any bacteria or chemicals by wearing rubber gloves. This will ensure your safety throughout the cleaning process.
Now that your toilet bowls are adequately prepared, you’re ready to move on to the next step – cleaning the rest of your bathroom.
Applying a Toilet Bowl Cleaner
After preparing your toilet bowls, it’s time to effectively clean them using a toilet bowl cleaner. This step is crucial for eliminating stubborn stains, water spots, and bacteria. Here’s how to apply a toilet bowl cleaner for maximum effectiveness:
1. Choose the right cleaner: When it comes to toilet bowl cleaners, there are various options available in the market. Look for a cleaner that specifically targets stains and germs, as they are formulated to dissolve grime and kill bacteria. Alternatively, you can use household products like white vinegar or a mixture of baking soda and water as natural alternatives.
2. Read the instructions: Before applying the cleaner, carefully read the instructions on the packaging or the recipe for a homemade solution. This will ensure you use the right amount and follow any special guidelines.
3. Apply the cleaner: Following the recommended instructions, apply the toilet bowl cleaner to the inside of the bowl. Starting at the rim, squeeze the cleaner onto the sides of the bowl, ensuring you cover the entire surface. If using a homemade solution, pour it directly into the bowl.
4. Let it sit: Allow the cleaner to sit for the recommended duration. This will give it ample time to break down stains and kill bacteria. Typically, this takes a few minutes, but refer to the instructions for precise timing.
5. Scrub and flush: After the cleaner has had time to work its magic, use a toilet brush to scrub the inside of the bowl thoroughly. Pay attention to hard-to-reach areas like under the rim and around the waterline. Once you’ve scrubbed every nook and cranny, flush the toilet to rinse away the cleaner and any loosened grime.
By following these step-by-step instructions, you can effectively apply a toilet bowl cleaner to ensure a clean and sanitary bathroom. Remember to ventilate the area properly during and after the cleaning process.
Wiping Down the Seats and Lids
After effectively cleaning the toilet bowls, the next step is to thoroughly wipe down the toilet seats and lids. This will help eliminate any lingering germs or bacteria and ensure a clean and sanitary bathroom environment. Here’s a simple step-by-step guide on how to wipe down the toilet seats and lids:
1. Choose a disinfectant: You can either use a store-bought disinfectant or create a homemade solution using rubbing alcohol, vodka, or white distilled vinegar. These options are effective in killing germs and sanitizing the surfaces.
2. Pour the disinfectant into a spray bottle: Transfer the disinfectant into a spray bottle for easy application. This will allow you to evenly spritz the top and bottom of the toilet seat and lid.
3. Spritz the surfaces: Begin by spraying the disinfectant onto the top and bottom surfaces of the toilet seat and lid. Make sure to cover the entire area to ensure thorough disinfection.
4. Let it sit: Allow the disinfectant to sit on the surfaces for about 5-10 minutes. This will give it enough time to effectively kill any germs or bacteria present.
5. Dampen a scrubber and wipe away dirt and stains: After the recommended time has passed, dampen a scrubber with warm water. Use the scrubber to gently wipe away any dirt or stains from the seat and lid. Pay attention to any areas that may require extra attention.
6. Rinse if necessary: If there is any residue left from the disinfectant or if you prefer a completely clean surface, rinse the seat and lid with clean water. This will remove any remaining disinfectant or loosened grime.
7. Wipe down the exterior surfaces: Finally, take a clean cloth or paper towel and wipe down the exterior surfaces of the toilet seat and lid. This will ensure that the entire area is clean and sanitized.
By following these simple steps, you can effectively wipe down the toilet seats and lids, leaving them germ-free and clean. Remember to use a disinfectant or homemade solution, spritz the surfaces, let it sit, wipe away dirt and stains, rinse if necessary, and wipe down the exterior surfaces.
Brushing the Inside of the Bowls
To ensure a clean and hygienic bathroom, it is essential to regularly brush the inside of the toilet bowls. Follow these simple steps for an effective cleaning:
1. Choose the right tool: Start by selecting a good quality toilet brush with sturdy bristles. This will help you effectively remove stains and grime from the bowl.
2. Begin from the rim: Wet the toilet brush with hot or warm water. Start scrubbing the inside of the bowls by moving from the rim towards the bottom. Be sure to cover every inch of the interior surface.
3. Scrub thoroughly: Apply some cleaning product or an all-purpose cleaner to the brush to enhance its cleaning power. Scrub the interiors in a circular motion, paying extra attention to any stubborn stains or buildup.
4. Rinse the brush: It is important to rinse the brush periodically while cleaning to remove any accumulated dirt. This will prevent spreading germs or leaving residue behind.
5. Flush and rinse: After scrubbing, pour water around the interiors of the bowl. Let it sit for a few moments before flushing. This will effectively eliminate any remaining dirt or cleaning product.
By following these steps and regularly brushing the inside of the toilet bowls, you can ensure a clean and fresh bathroom. Remember to clean the toilet brush itself after use and store it in a clean and dry area.
Flushing and Rinsing Away Residue
After scrubbing the toilet bowl with a cleaning product, it’s important to flush and rinse away any remaining residue. Follow these steps to thoroughly clean the bowl:
1. Start by thoroughly flushing the toilet. This will help remove any cleaning product that may have been left behind.
2. Take a clean toilet bowl brush and scrub the inside of the bowl. Pay special attention to areas where residue may be present, such as under the rim and around the waterline.
3. Once you have finished scrubbing, flush the toilet again. This will rinse away any remaining residue and help ensure a clean and fresh bowl.
By flushing and rinsing the toilet, you can effectively eliminate any leftover cleaning product or residue. This will leave your toilet bowl looking clean and hygienic. Remember to regularly clean and disinfect your toilet to maintain a healthy and sanitary bathroom environment.
Cleaning Bathroom Fixtures and Surfaces
Introduction
Maintaining a clean and hygienic bathroom is essential for your health and well-being. From toilet bowls to shower curtains, there are several fixtures and surfaces that require regular cleaning to ensure a sparkling bathroom. In this guide, we will provide you with step-by-step instructions on how to effectively clean different bathroom fixtures and surfaces, using simple household items and cleaning products. From scrubbing toilet bowls to wiping down countertops, this comprehensive guide will help you tackle the task of cleaning your bathroom efficiently and effortlessly. So, grab your cleaning supplies and let’s get started!
1. Toilet Bowls
Start by pouring a cup of bleach into the toilet bowl and allowing it to sit for a few minutes. Then, using a toilet brush, scrub the inside of the bowl thoroughly, paying extra attention to stubborn stains. Flush the toilet to rinse away the bleach and residue. For a more natural option, mix equal parts white vinegar and water in a spray bottle, spray inside the bowl, and scrub with a toilet brush.
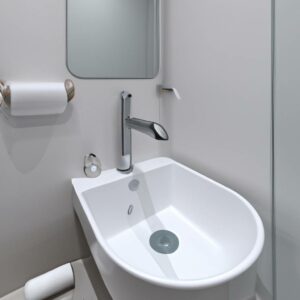
2. Bathroom Sinks and Countertops
To clean bathroom sinks and countertops, start by removing any loose dirt or debris with a damp cloth. Next, apply an all-purpose cleaner or a mixture of dish soap and warm water to the surface. Use a soft sponge or cloth to scrub away any grime or stains. Rinse with clean water and dry with a microfiber cloth to prevent water spots.
3. Shower Fixtures and Walls
For shower fixtures, mix equal parts white vinegar and water in a spray bottle. Spray the mixture onto the fixtures and let it sit for a few minutes. Use a soft sponge or cloth to wipe away soap scum and mineral deposits. Then, rinse with clean water and dry with a microfiber cloth. For shower walls, use a grout brush and a bathroom cleaner to scrub away any grime or stains. Rinse thoroughly and dry the walls with a clean cloth.
4. Mirrors and Glass Surfaces
To clean mirrors and glass surfaces, spray a glass cleaner or a mixture of equal parts water and white vinegar onto the surface. Use a lint-free microfiber cloth or newspaper to wipe away streaks and smudges. For stubborn stains, spray the cleaner directly onto a soft cloth and rub gently.
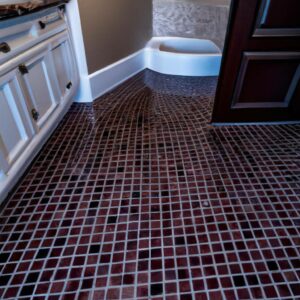
5. Floors and Tiles
Start by sweeping or vacuuming the bathroom floor to remove any loose dirt and debris. Next, mix a bucket of warm water with a small amount of a mild detergent or a bathroom cleaner. Use a mop or a sponge to clean the floor, paying extra attention to any stains or spills. Rinse the mop or sponge frequently and change the water if it becomes dirty. Finally, thoroughly rinse the floor with clean water and dry with a microfiber cloth or allow it to air dry.
By following these simple steps, you can keep your bathroom fixtures and surfaces clean and sparkling. Remember to wear rubber gloves while cleaning, and always read and follow the instructions on cleaning products for safety and best results. Regular maintenance and cleaning will ensure a fresh and inviting bathroom for you and your family.
Washing Out Bathroom Sinks with Soapy Water
To effectively wash out bathroom sinks, you can use a simple yet powerful solution of soapy water. Here’s a step-by-step guide on how to do it:
1. Gather your supplies: You will need a non-scratch scrubber or sponge, a bucket or basin, and some dish soap.
2. Prep the sink: Start by removing any loose dirt or debris from the sink using a damp cloth. This will help ensure a more thorough cleaning.
3. Fill the sink with hot water: Fill the sink with hot water, making sure it is at a comfortable temperature to work with. If desired, you can add half a cup of white vinegar to the water. White vinegar acts as a natural degreaser and can help remove any stubborn stains or odors.
4. Let it sit: Allow the hot soapy water to sit in the sink for about 10-15 minutes. This will help loosen any grime or buildup, making it easier to clean.
5. Scrub the sink: Take your non-scratch scrubber or sponge and start scrubbing the sink surface. Focus on areas with stains or deposits, applying a bit more pressure if needed. The combination of hot water and dish soap will help break down and remove dirt and grime.
6. Rinse thoroughly: After scrubbing, thoroughly rinse the sink with clean water. Make sure to remove all traces of soap and vinegar, as they can leave residue if not rinsed properly.
7. Dry and shine: Once rinsed, take a clean, dry cloth or paper towel and give the sink a good wipe-down. This will help remove any excess water and leave a shiny, streak-free finish.
By following these simple steps and using soapy water, you can effectively wash out your bathroom sink, leaving it clean and fresh. Remember to regularly clean your sink to maintain its hygiene and prevent the buildup of grime or stains.
Disinfecting Hard Surfaces with All-Purpose Cleaner
To effectively disinfect hard surfaces in your bathroom, an all-purpose cleaner is your go-to solution. Not only does it eliminate dirt and grime, but it also tackles germs and bacteria, leaving your bathroom fresh and clean.
To begin, grab your trusty bottle of all-purpose cleaner and a clean cloth or sponge. Spray the cleaner directly onto the surface you wish to disinfect, ensuring to cover the entire area.
Allow the cleaner to sit for a few minutes to give it time to break down any germs or bacteria present. This dwell time is crucial in ensuring a thorough cleaning.
Once the cleaner has had enough time to work its magic, grab a clean cloth or sponge and begin to wipe away the cleaning solution. Make sure to focus on any areas that may have a higher concentration of germs, such as faucet handles or light switches.
Continue wiping until all traces of the cleaner have been removed, ensuring a germ-free surface.
Repeat this process for all hard surfaces in your bathroom, including countertops, toilet seat, and shower walls.
By incorporating the use of an all-purpose cleaner into your bathroom cleaning routine, you can effectively disinfect your hard surfaces, eliminating germs and bacteria that can cause illness.
Removing Water Stains from Shower Heads
One common problem in bathrooms is the buildup of water stains on shower heads, which can make your bathroom look dirty and affect the water flow. Fortunately, there are simple steps you can take to remove these stains and restore your shower head to its sparkling clean condition.
To begin, you can create a homemade cleaning solution by mixing equal parts of water and white vinegar. Alternatively, you can use a natural solution by cutting a lemon in half and covering it with bicarbonate of soda.
Next, apply the solution to the shower head by either soaking it in the watered-down vinegar mixture or rubbing the lemon-covered bicarbonate of soda all over the surface. Ensure that all areas affected by water stains are thoroughly coated.
Allow the solution to sit for about 15-20 minutes. During this time, the vinegar or lemon will penetrate and break down the mineral deposits causing the water stains.
After the waiting time, rinse the shower head with clean water to remove the cleaning solution and any loosened mineral deposits. Use a soft cloth or a gentle brush to scrub away any remaining stains or buildup.
Finally, dry and buff the shower head with a dry microfiber cloth to restore its shine.
With these easy steps, you can effectively remove water stains from your shower head, improving both its appearance and functionality. Remember to regularly clean your shower head to prevent future buildup and maintain a clean bathroom.
Scrubbing Away Soap Scum from Shower Walls and Curtains
To effectively remove soap scum from shower walls and curtains, start by using an all-purpose cleaning solution. Spray the solution onto the surfaces and focus on areas with visible soap scum buildup.
Next, use a brush or abrasive sponge to scrub the walls and curtains thoroughly. Apply some elbow grease and pay close attention to any stubborn stains or residue. The bristles or texture of the sponge will help loosen and remove the soap scum.
After scrubbing, rinse the walls and curtains with warm water. This will wash away the cleaning solution and any loosened soap scum. Repeat the process if necessary until the shower walls and curtains are clean and free of soap scum.
Remember to dry the surfaces thoroughly to prevent water spots or buildup. Use a clean cloth or towel to remove excess moisture and ensure a streak-free finish.
By following these simple steps and using an all-purpose cleaning solution, you can efficiently scrub away soap scum from shower walls and curtains, leaving your bathroom looking fresh and clean.
Wiping Mirrors, Counters, and Other Non-Porous Surfaces with Microfiber Cloths
When it comes to cleaning mirrors, countertops, and other non-porous surfaces in your bathroom, microfiber cloths are your best friend. These soft and absorbent cloths are perfect for removing dirt, dust, and grime without leaving any streaks behind. Here’s a step-by-step guide on how to effectively clean these surfaces using microfiber cloths:
1. Prepare the cleaning solution: For mirrors, you can use a glass cleaner or simply mix equal parts of vinegar and water in a spray bottle.
2. Spray the cleaning solution onto the surface: If you’re using a glass cleaner, follow the instructions on the bottle. If you’re using the vinegar and water mixture, spray it evenly on the mirror or countertop.
3. Wipe the surface with a microfiber cloth: Start from the top and work your way down, using smooth and gentle motions. Make sure to cover the entire surface, including the edges and corners.
4. Pay attention to soap scum and toothpaste residue: These can be stubborn, but microfiber cloths are up to the task. Apply a bit more pressure and scrub these areas gently until they’re completely clean.
5. Repeat if necessary: If there are still visible streaks or residue, you may need to repeat the process. Spray the cleaning solution again and give it another thorough wipe with the microfiber cloth.
By following these simple steps and using microfiber cloths, you can achieve sparkling clean mirrors, counters, and other non-porous surfaces in your bathroom. Happy cleaning!
Dealing With Tough Stains in the Bathroom
Dealing with tough stains in the bathroom can be a daunting task, but with the right methods and cleaning products, you can restore your bathroom to its sparkling clean state. Here are some effective ways to tackle common tough stains:
1. Mineral Stains in Toilet Bowls: To remove stubborn mineral stains, start by wearing rubber gloves. Pour a cup of white vinegar into the toilet bowl and let it sit for about 30 minutes. Then, scrub the stains with a toilet brush and flush. For extra stubborn stains, you can sprinkle some baking soda in the toilet bowl before scrubbing.
2. Water Stains on Shower Heads: Fill a plastic bag with equal parts of white vinegar and warm water. Place the bag over the shower head, ensuring that the head is fully immersed in the solution. Secure the bag with a rubber band and let it sit overnight. In the morning, remove the bag and use a damp cloth to wipe away any remaining stains.
3. Soap Scum on Shower Walls and Curtains: Prepare a mixture of equal parts of hot water and dish soap in a spray bottle. Spray the solution onto the affected areas and let it sit for a few minutes. Then, use a scrub brush or grout brush to gently scrub away the soap scum. Rinse thoroughly with clean water.
4. Tough Stains on Bathroom Sinks: Apply an all-purpose cleaner directly to the stains and let it sit for a few minutes. Then, use a soft sponge or cloth to gently scrub the stains in a circular motion. Rinse with clean water and dry with a microfiber cloth.
Remember, always read and follow the instructions on the cleaning products you use. With a little elbow grease and the right cleaning methods, you can easily remove tough stains in your bathroom.
Conclusions
In conclusion, cleaning your bathroom regularly and implementing proper maintenance practices is crucial for a clean and hygienic space. By following the step-by-step guide mentioned above, you can effectively tackle various cleaning tasks.
Some key takeaways from the cleaning process include using appropriate cleaning products such as all-purpose cleaners, white vinegar, and dish soap. Additionally, utilizing the right tools like microfiber cloths, scrub brushes, and toilet brushes can make a significant difference in achieving a thorough clean.
It is important to note that regular maintenance is key to prevent buildup and stains. Consider incorporating a daily 10-minute cleaning session into your routine to keep your bathroom tidy. This can include wiping down surfaces, cleaning mirrors, and spot-cleaning any spills or messes. In addition, performing a more detailed weekly cleaning that covers all areas of the bathroom will help maintain a pristine environment.
Remember, consistency is key to maintaining a clean and inviting bathroom. By following these cleaning practices and investing a little time and effort, your bathroom can stay fresh and welcoming for everyone to enjoy.